
Cloud Flight 2 - Instant Pair - Troubleshooting
Updated
For initial Instant Pair troubleshooting, any updates for NGENUITY, Instant Pair, and the supported device should be installed first.
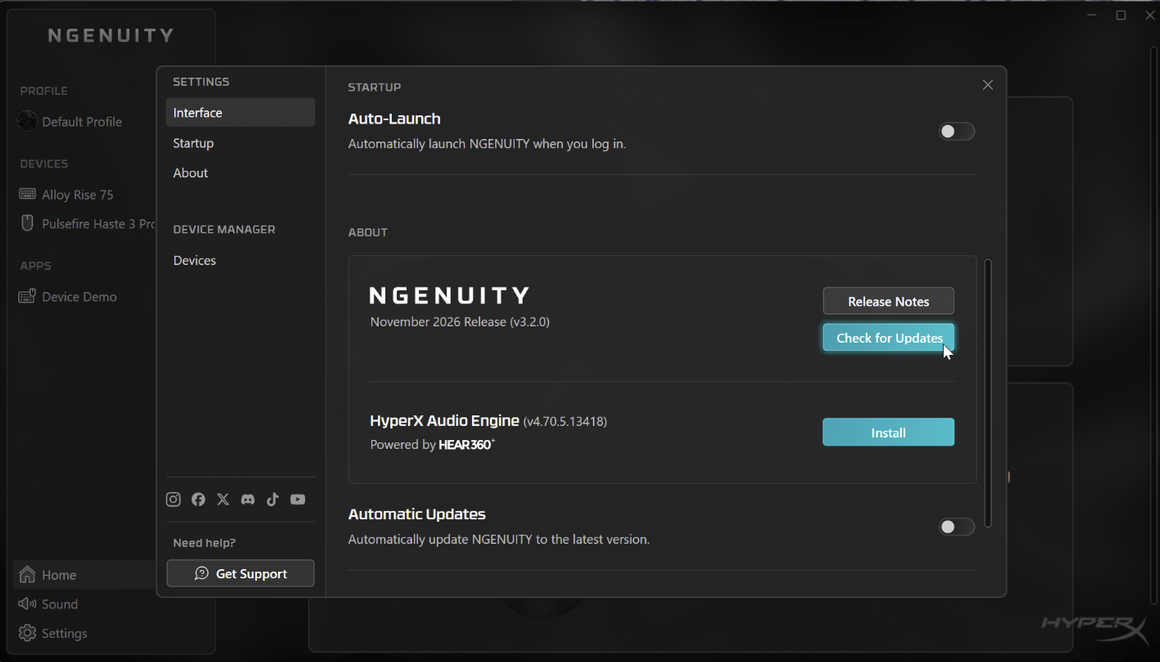
Check if NGENUITY is on the latest software version.
From the NGENUITY home page, click on “Settings”.
Under the “Settings” side menu, click on “Interface”.
Under the “About” section, next to NGENUITY, click on “Check for Updates” to see if there is a newer software version available.
Check if Instant Pair and the supported device are on the latest firmware version.
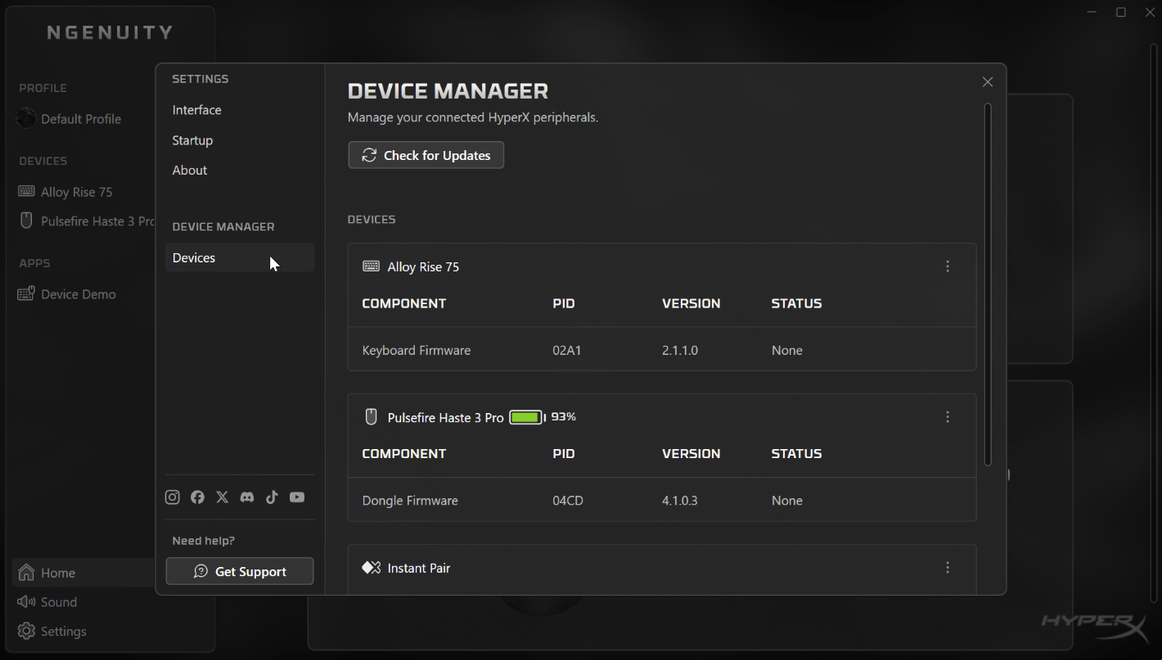
From the NGENUITY home page, click on “Settings”.
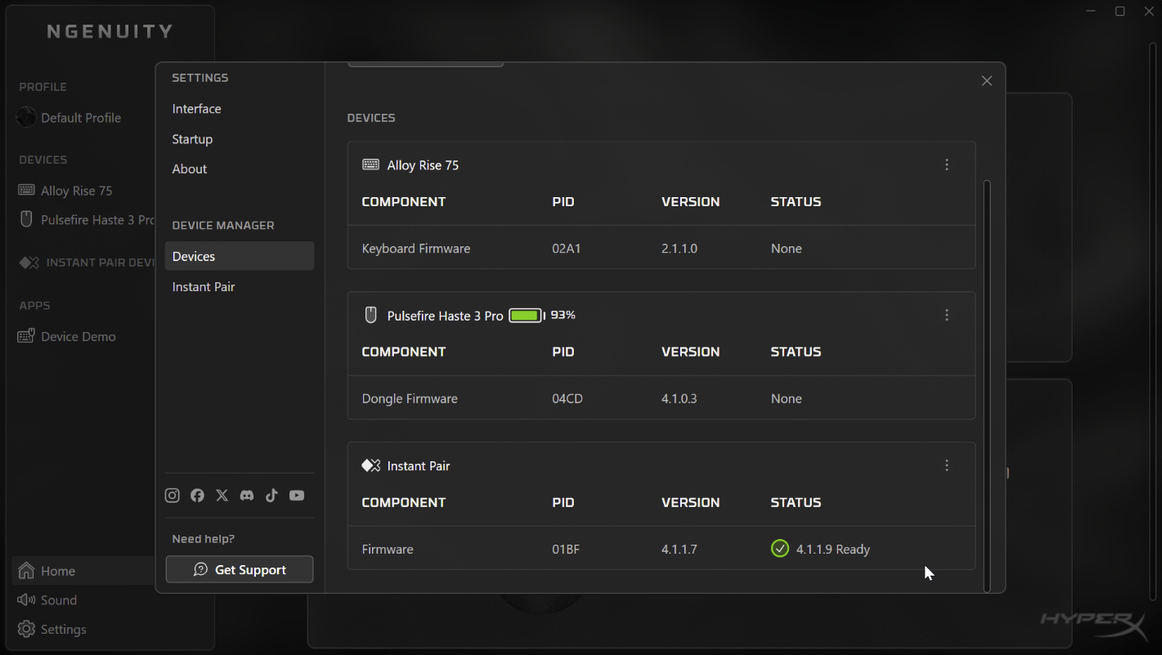
Under the “Device Manager” side menu, click on “Devices”.
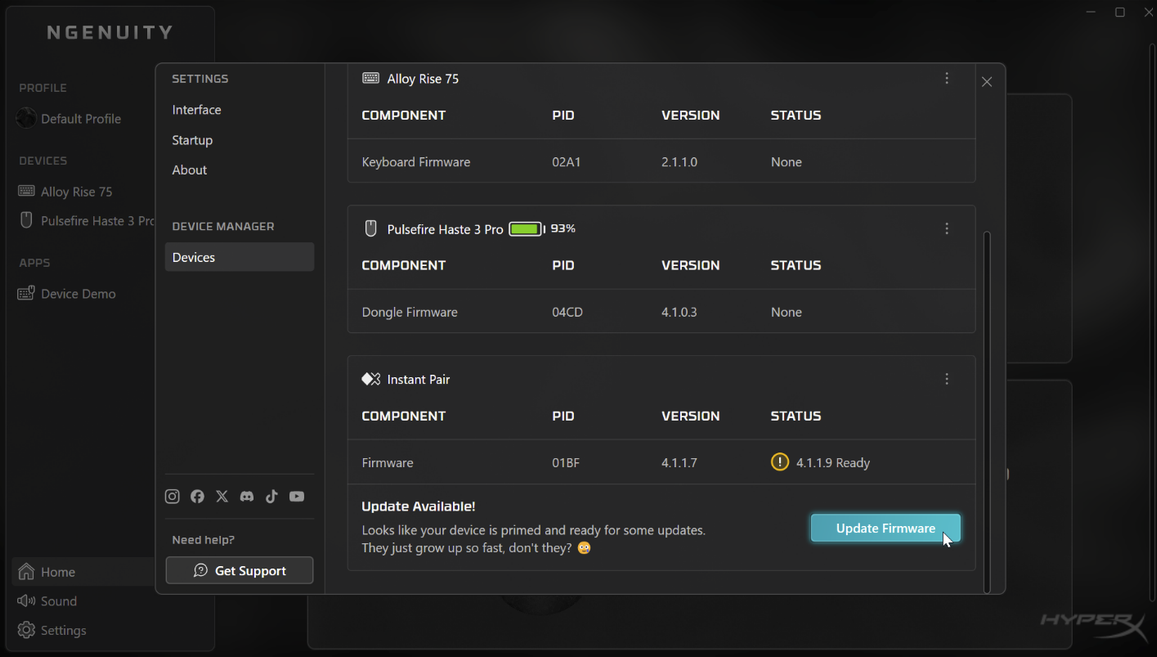
Under the “Devices” section, scroll down and find the Instant Pair device.
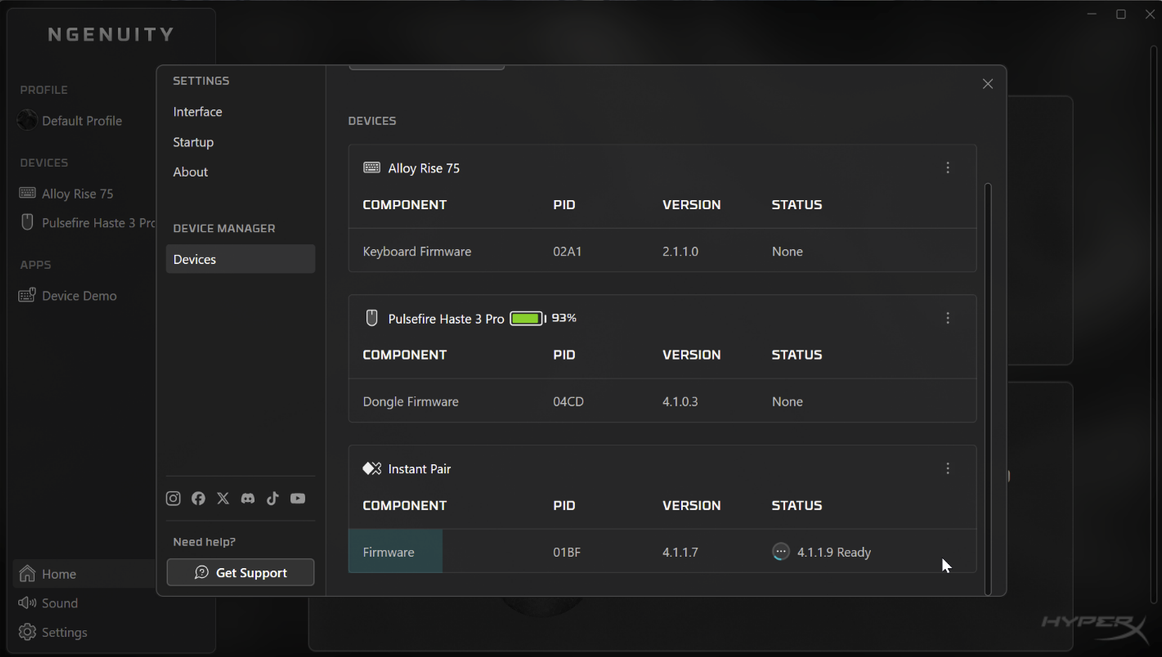
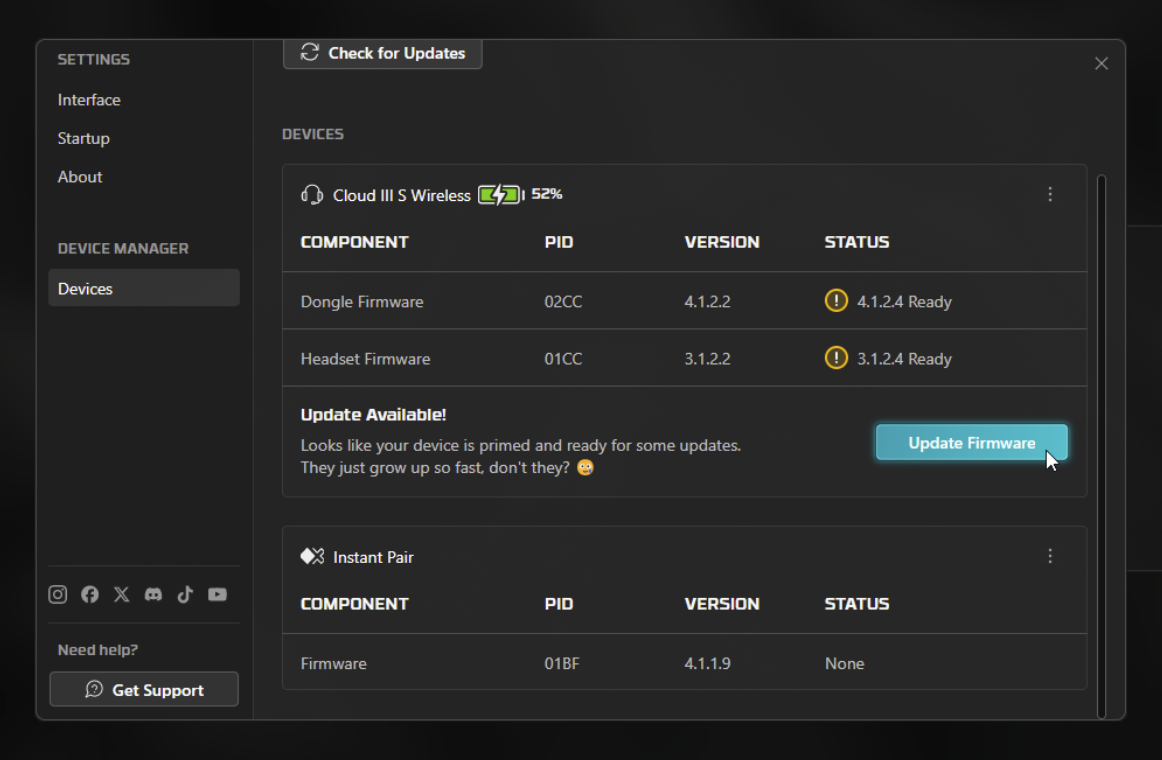
If there is a firmware update available, click on “Update Firmware” to update the Instant Pair device.
Plug in both the device USB dongle and the device to the PC via USB cable
On the same page, find the device and click on “Update Firmware” if an update is available.
If there are still issues with pairing, a factory reset can be performed on both the Instant Pair internal adapter and the supported device. This will clear all Instant Pair related pairing info on both the system and device.
Perform a factory reset on the Instant Pair internal adapter
From the NGENUITY home page, click on “Settings”.
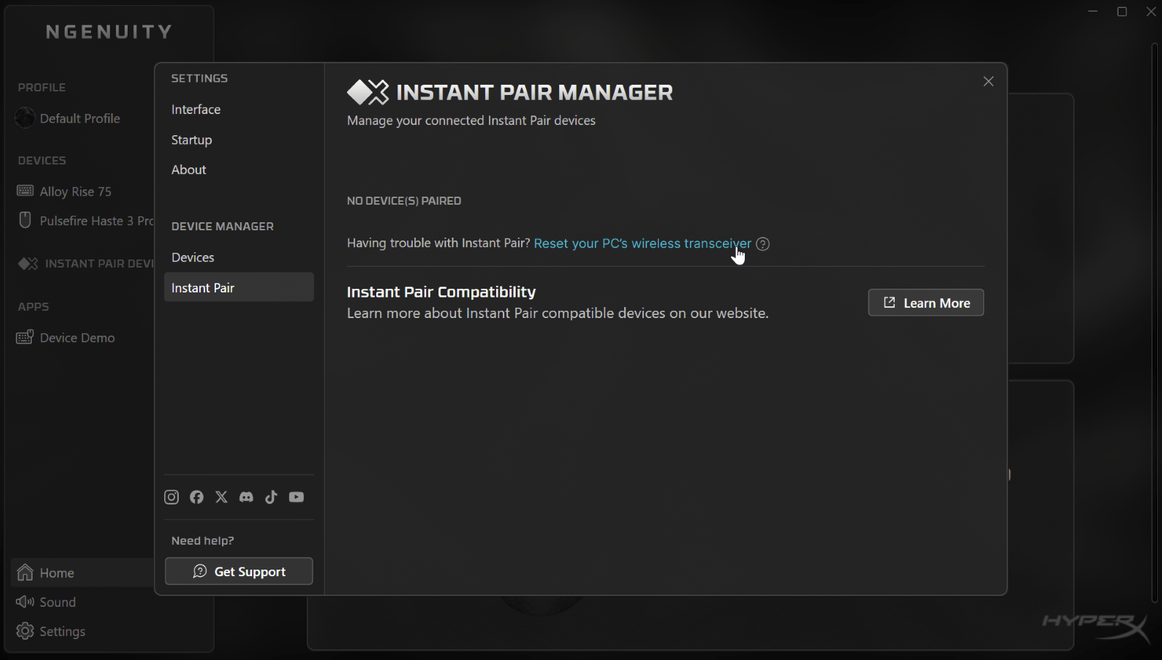
Under the “Device Manager” side menu, click on “Instant Pair”.
Click on “Reset your PC’s wireless transceiver”
Click on “Reset” to confirm the factory reset.
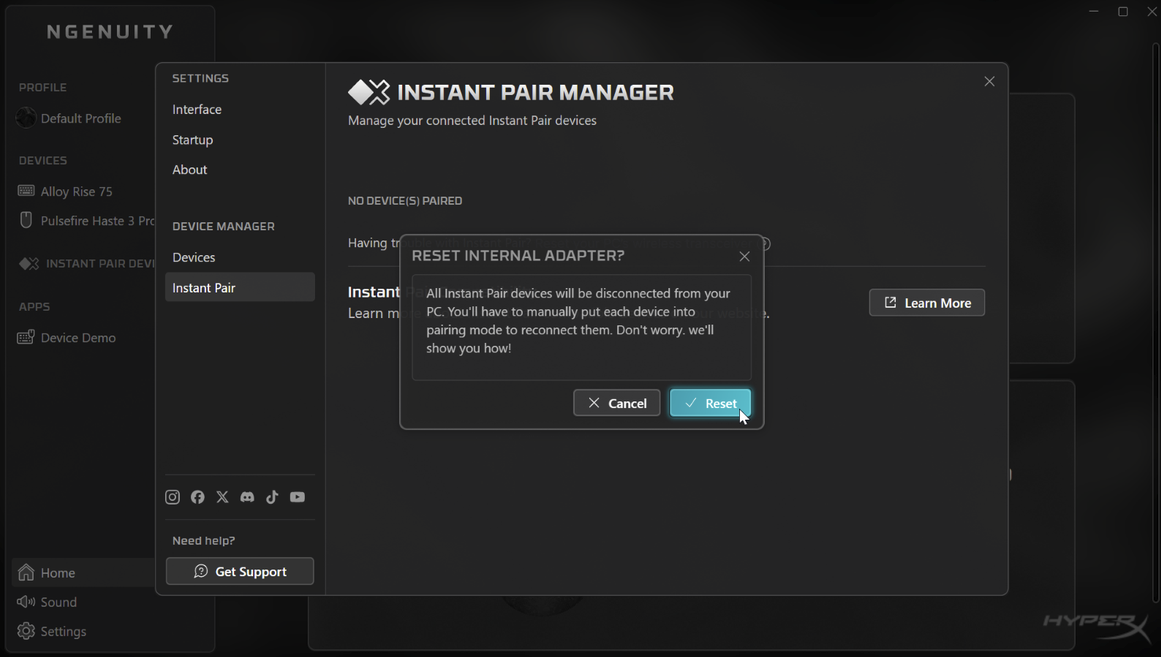
The Instant Pair internal adapter should now be in a factory state and should be ready to pair with any Instant Pair compatible devices.
Perform a factory reset on the supported device
Follow the instructions in the relevant article below:
Cloud III S Wireless & Flight 2 Wireless: Cloud III S Wireless - Factory Reset
After performing a factory reset on the device, the device should be ready to pair with any Instant Pair compatible system.